toby
hazel.

Using a 3D Model
May 2021

Origami Meditator
June 2020

Three Carvings
September 2018

Oil Bars
October 2016

Winged Lily and Babushka
April 2016

Limpets and Barnacles
November 2015

Replica Papyrus
July 2015

Seated Lady
June 2015

Works in Progress
June 2015

Performance of the Vision on Earth
April 2015

Replicating the Beauty of Nature
March 2015
_t.jpg "Performance (Purple and Pink)")
Performance (Purple and Pink)
March 2015

Using a Tablet for Sketching
February 2015

Prostrate Figure
January 2015

Worry
November 2014

Meditation
November 2014

Footsteps on Beer Beach
October 2014

Standing Lady
October 2014

Modest Beginnings and Finished Products
September 2014

Back to the Studio
September 2014

The Significance of Circles
September 2014

Programming as a Creative Process
September 2014

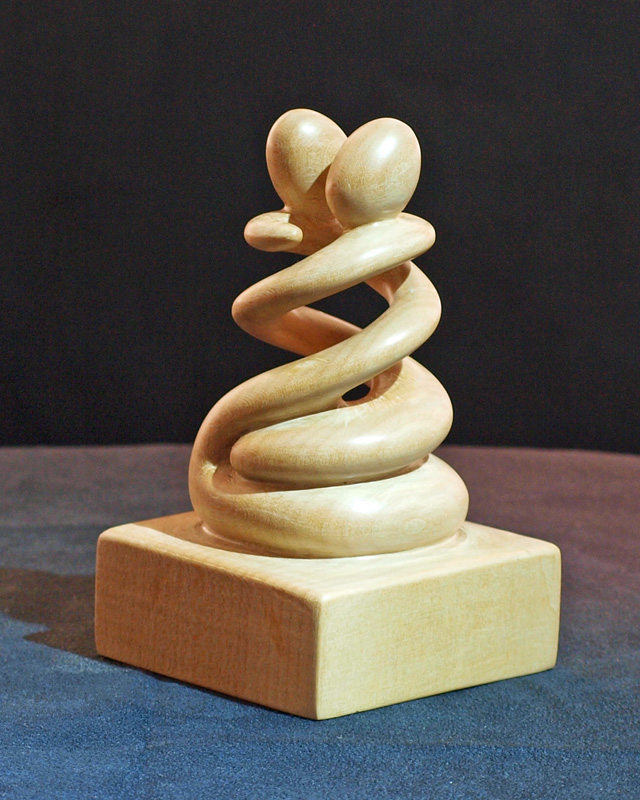
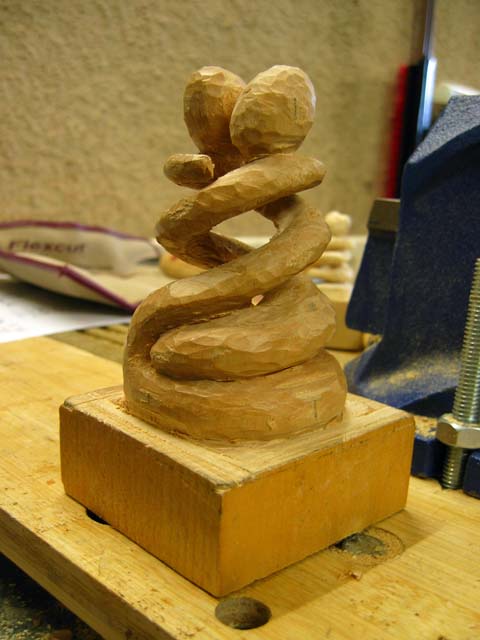
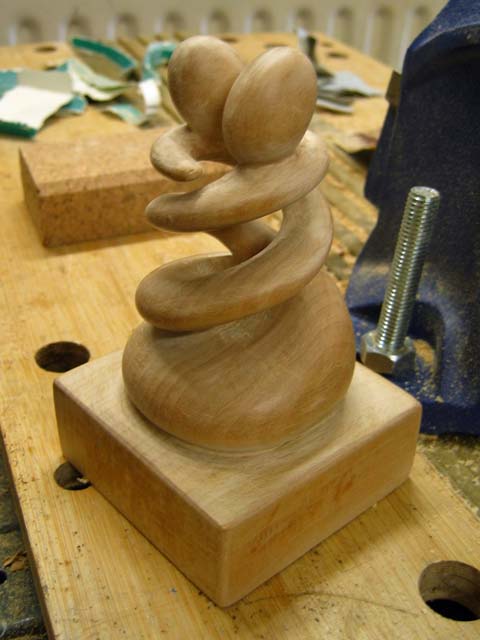
Carving Spiral Embrace
September 2014

Buried Treasure
June 2011

Baddies at the Bus-Stop
November 2011
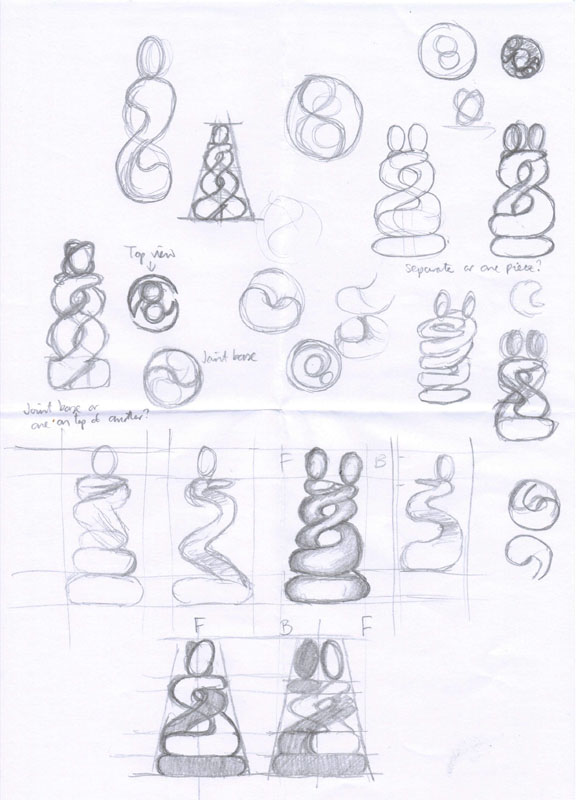
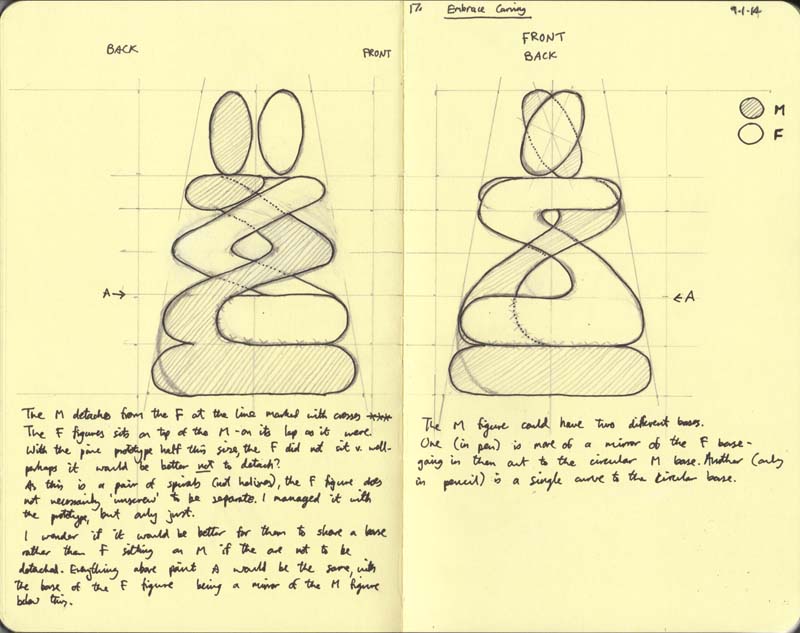
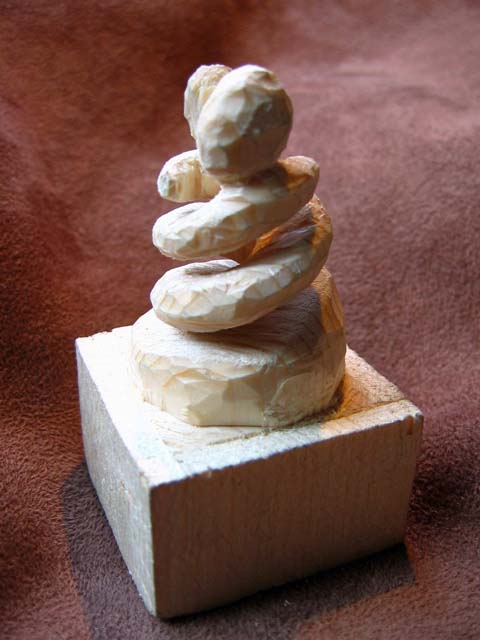
Here is a description of my entire carving process for what was a very ambitious piece for me: 'Spiral Embrace' - a wedding anniversary present for my wife. I had started on the designs about 5 months before I began carving, so I had a lot of time to think about it. It took about 14 hours of carving work spread out over a month. The fact that it had to be done in secret was an additional challenge!
1.
 2.
2.
1. The vast majority of my carvings start out as sketches around a general idea. The initial idea for this piece was of two figures entwined round each other in a spiral, but forming a single form, with one supporting the other at the base.
2. From the rough sketches, I draw an accurate design from the front and the side. I sometimes make notes as it can be hard to map these 2D images onto a 3D block of wood, especially with a continuously curved shape like a spiral.
3.
 4.
4.
 5.
5.
3. For complicated carvings, I sometimes do a smaller version to start with, using a soft wood like pine. This allows me to test out how I imagined the 3D piece. I was unsure whether to have this piece divide into two or stay connected. Dividing the piece didn't really work with the maquette, so I decided against it for the final piece.
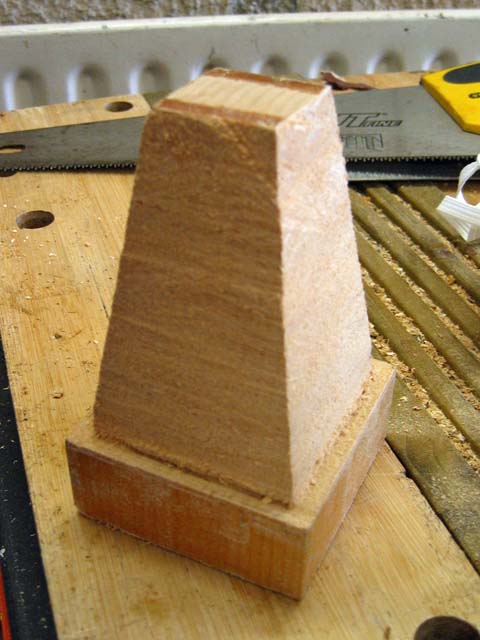
4. I cut away large sections of wood from the initial block before I start using knives or chisels. This can be tiring work as it is done by hand and the wood is hard.
5. I trace the 2D designs onto the sides of the wood. I often have to do this several times as I cut away portions of the design.
6.
 7.
7.
 8.
8.
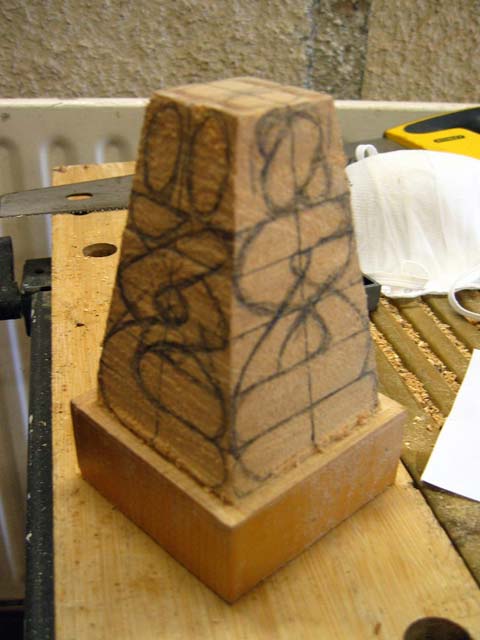
6. Here all of the saw-work is complete, and I have redrawn the design onto the wood by eye.
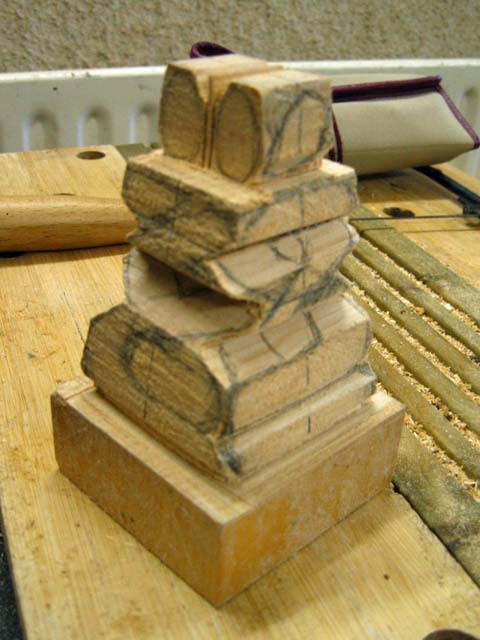
7. Now I have started to use carving knives to take away larger chunks of wood. This is where I have to work hard to visualise the sculpture in order to bridge the gap between the 2D designs and the 3D shape. I get very nervous at this point, and it is the hardest part of the carving for me. This is where having a small version of the carving to refer to comes in very useful.
8. I have now formed a nice continuous spiral with the figures, and the only large portion of wood that has yet to be removed is a central core.
9.
 10.
10.
 11.
11.
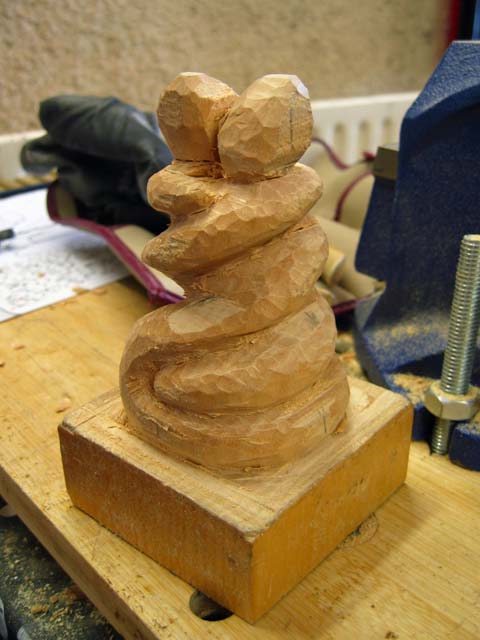
9. Here the core has been removed through lots of careful carving from all available angles. I remember that it is very rewarding to reach this point in a carving. The two figures are now distinct and I am starting to get excited about how it will look when finished.
10. I have now finished carving and have completed the first few rounds of sanding. You can see how the piece will look, but the finish is still rough.
11. The final piece after fine sanding. All that is left to do is apply a couple of coats of finishing wax and polish.